UPort Wireless MAVLink
The serial port configuration used by MAVLink must match the UPort serial port configuration. Otherwise, the connection may fail.
UPort consumes about 5 V / 1 A. If the flight controller power supply is insufficient, use an additional power supply for UPort.
Step 1: Configure the UART on UPort
PX4 or Ardupilot MAVLink connections must be bound to a Telemetry UART. In most cases, the configuration is 8N1: 8 data bits, 1 stop bit, and no parity. The default baud rate is usually 57600 or 115200. To make full use of UPort performance, set the baud rate to 150000 8N1, that is, 1.5 Mbps. Although UPort UART passthrough can reach 3 Mbps, confirm that the flight controller hardware supports the selected rate.
Flight Controller Configuration
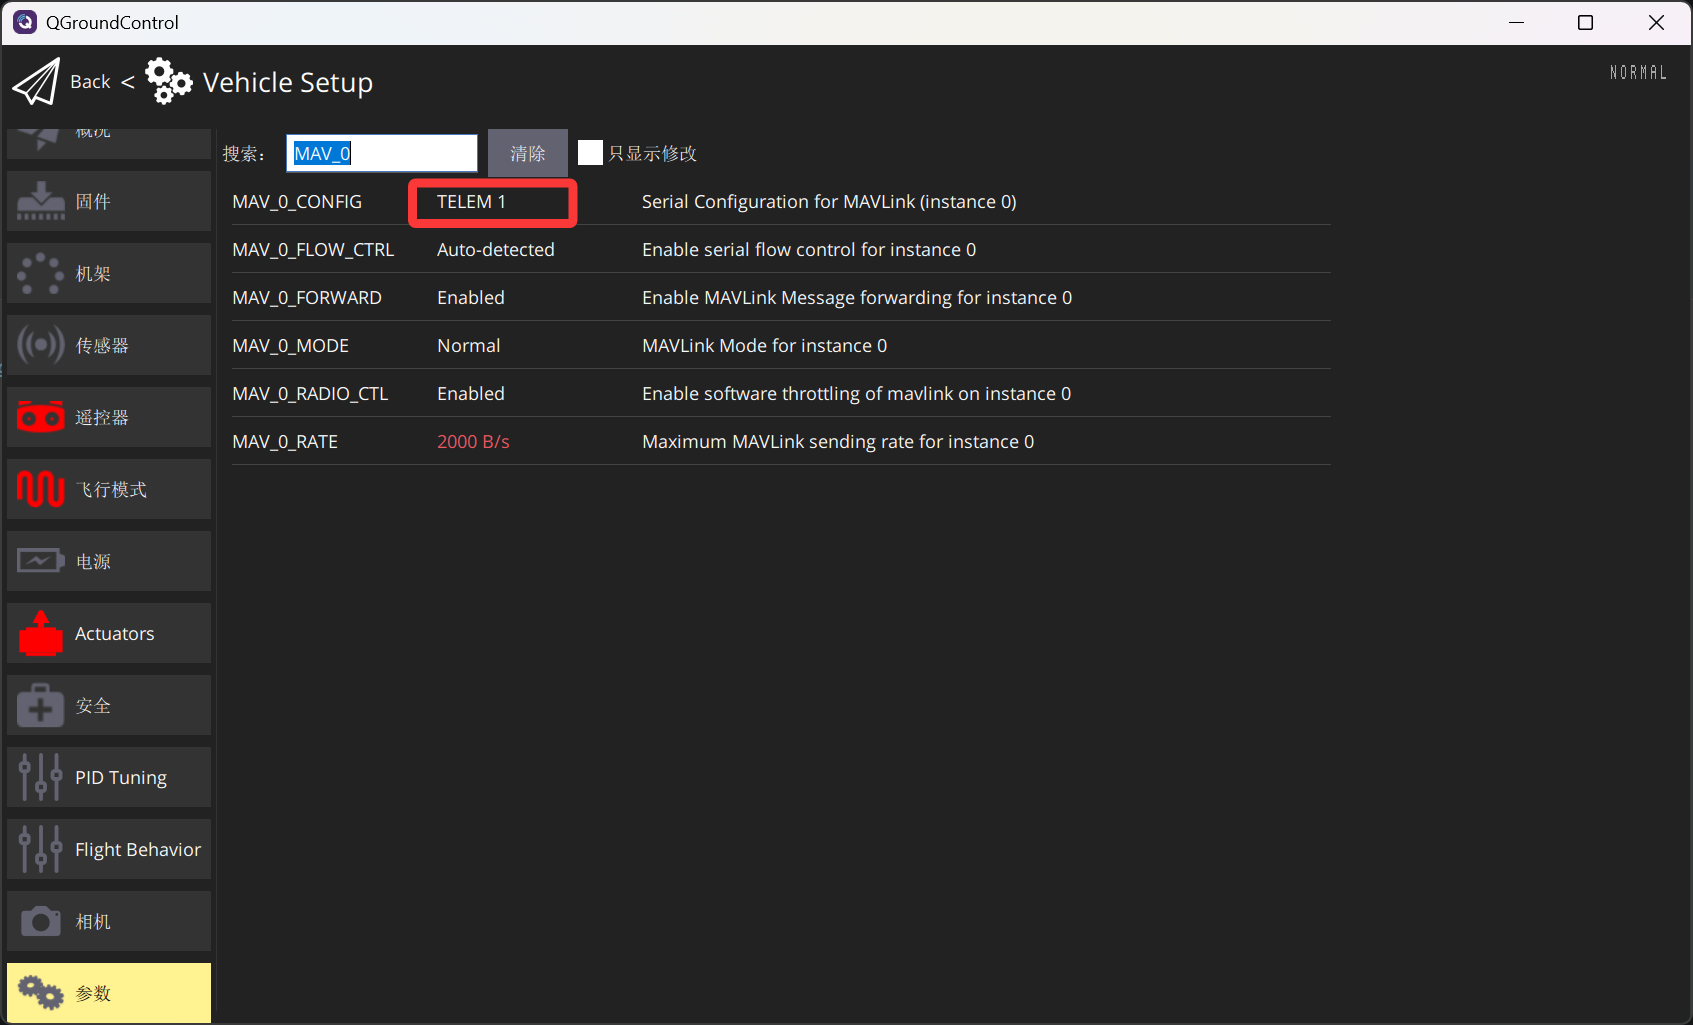
Using PX4 as an example, configure TELEMETRY1 as MAV_0_CONFIG with a baud rate of 150000 and 8N1.
First search for the Mavlink parameter. In this example, select MAV_0_CONFIG, configure it as TELEM1, and also change MAV_0_RATE to 13000.
Configure UPort UART 1 as 150000, 8N1, and connect it to the flight controller TELEMETRY2 port.
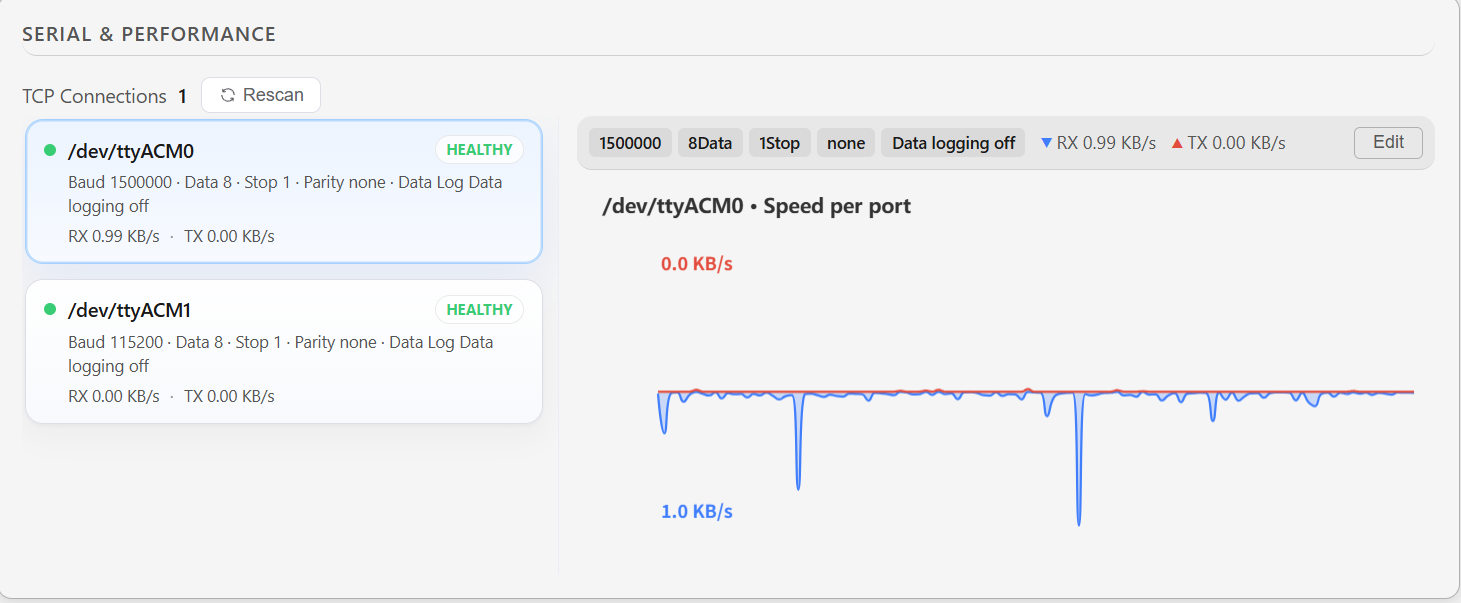
Connect the wiring. At this point, the UPort screen should show that data is received correctly and display the current UART data rate. By default, the average rate is about 1.5 KB/s.
Step 2: Connect QGC to the UPort UART Passthrough Port
Click the communication icon in QGC, select Application Settings, select communication links, and add a new communication method. Configure the TCP connection as shown below. The IP address is the UPort IP address, and the port number is the UPort UART passthrough port plus 20000.
In serial port order, UART 1 maps to passthrough port 20000, UART 2 maps to passthrough port 20001, UART 3 maps to passthrough port 20002, and so on.
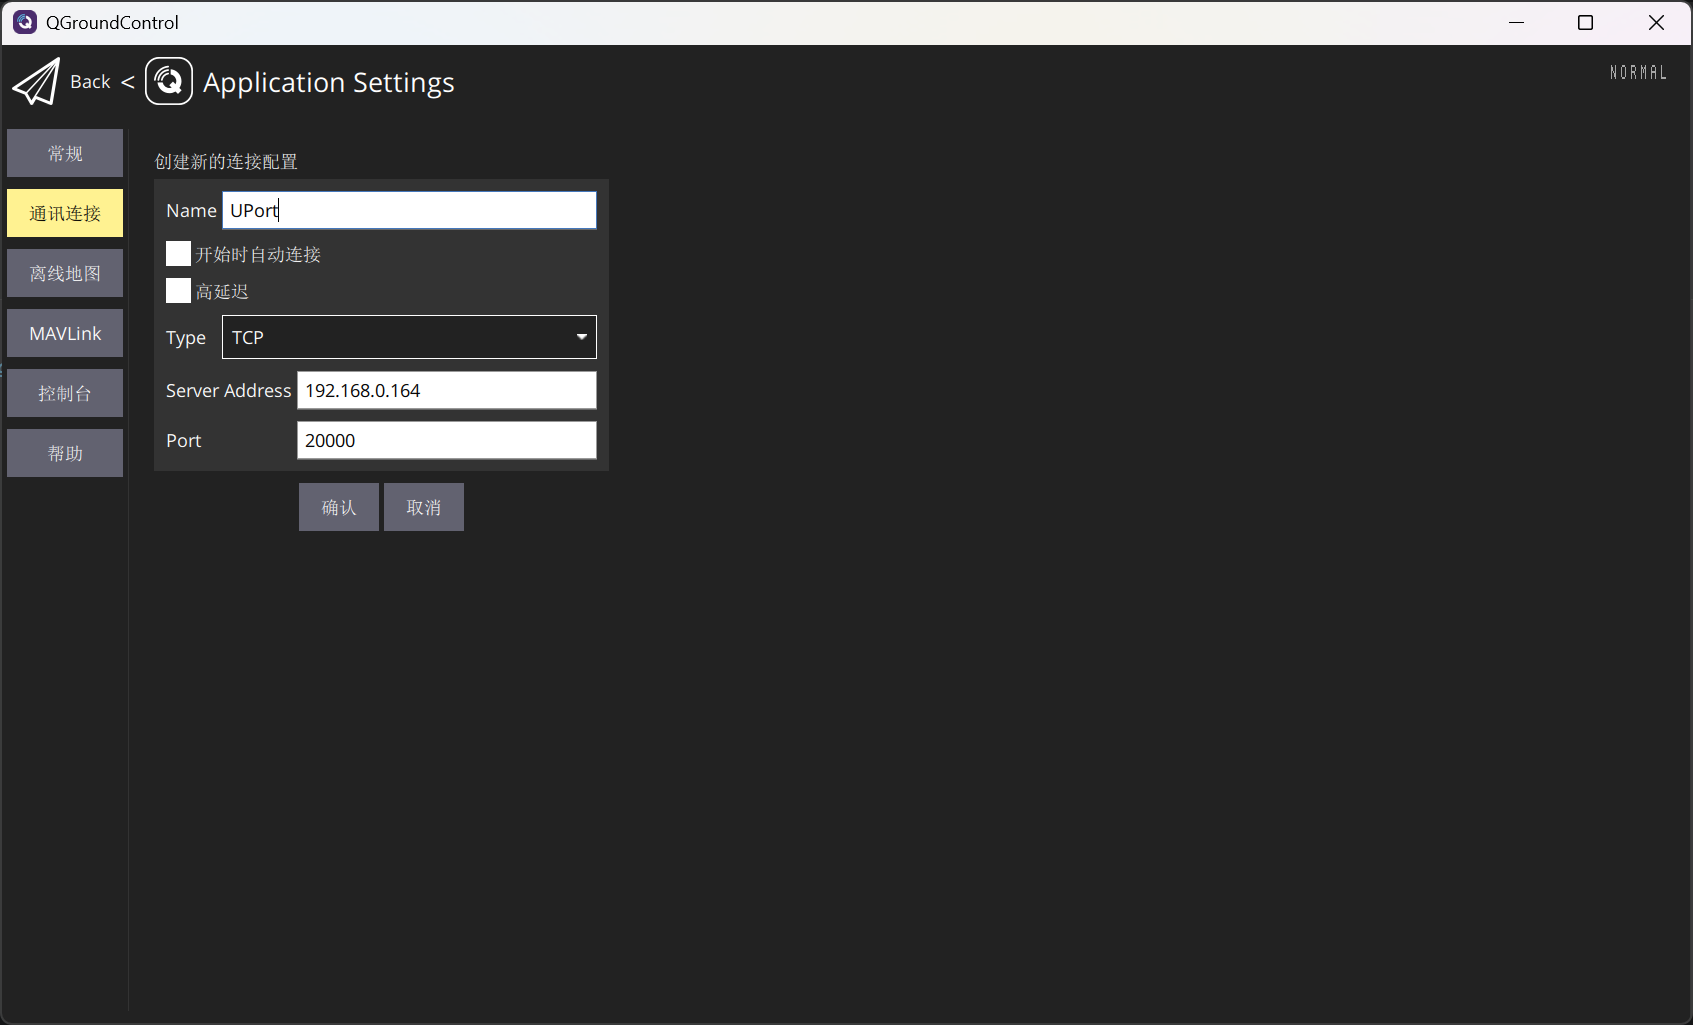
After finishing the configuration, click connect and return to the main page. The system connects successfully, and system latency is about 31 ms.
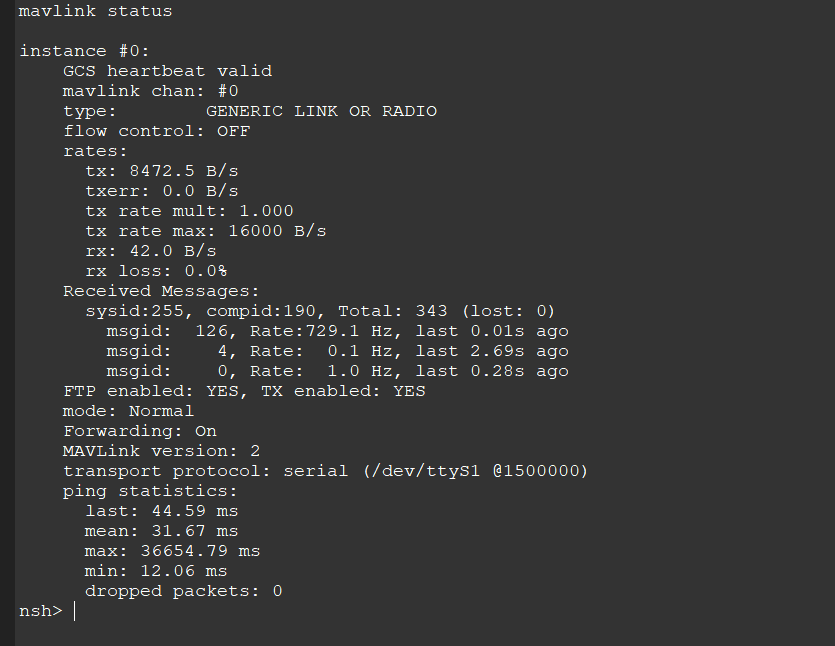
To make PID tuning easier, manually increase the update rate of some MAVLink data in QGC. First enter the Mavlink console. Enter the following commands:
mavlink status
# /dev/ttyS1 must match the flight controller serial port from the previous command
mavlink stream -d /dev/ttyS1 -s HIGHRES_IMU -r 50
mavlink stream -d /dev/ttyS1 -s ATTITUDE -r 50
mavlink stream -d /dev/ttyS1 -s ATTITUDE_QUATERNION -r 50
mavlink status
With the current settings, the system uses only about 8 KB/s of bandwidth. The baud-rate limit is about 15 KB/s, so about 50% of the bandwidth remains. Setting the rate to 3 Mbps is recommended for more bandwidth and a higher refresh rate, but confirm that the flight controller supports it first.